Week Ending 10 June 2018 Update

Guess how this week started out?  Yep, too much time spent with the day job.  But at least it's starting to slack off a bit and give me some openings again.  I hope work continues to lighten up, so, you know, I can get to work.

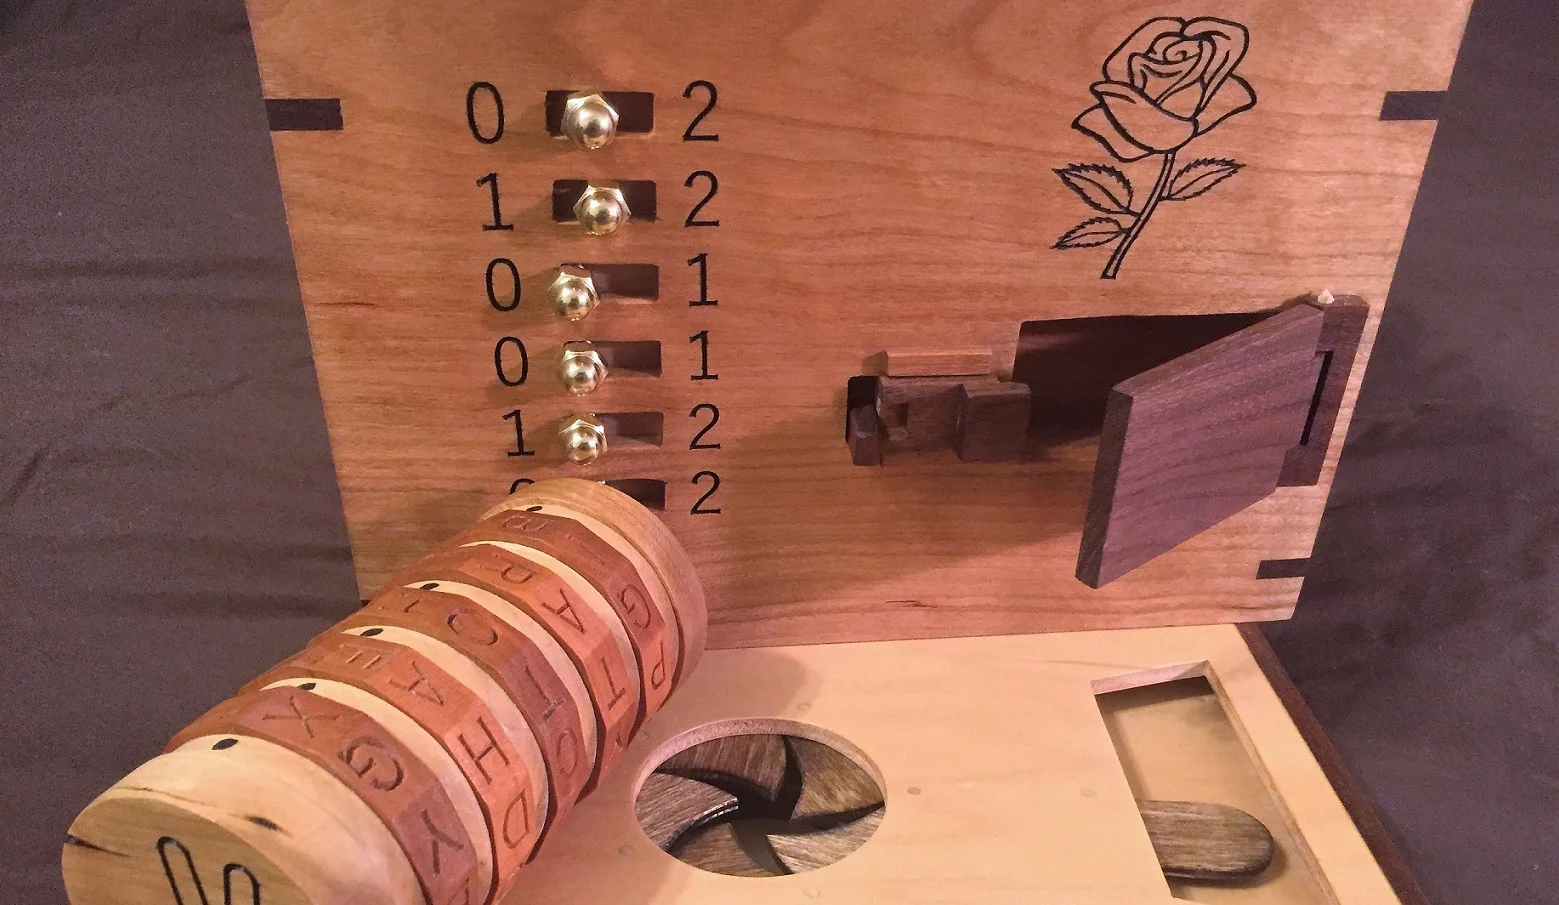
I am a bit worried about the iris drawer binding up in humid conditions, so one night I CNC'd out another set of parts.  That wasn't too long and while they are cleaned up they need a bit of sanding and fitting, maybe just another hour or so.  I figure this way I haven't a second set ready if needed.  My goal, if I need to, is to make a drawer that someone could open to repair if there are ever problems.  I wanted to do that initially, but thought I should lean towards just finishing instead of making it a little more perfect.  It's a real balance.  I might still want to make one out of acrylic but some research told me I need a new bit, probably single flute upcut.  Plus, using home store plexiglass isn't good as that is extruded, but there are other versions to buy that respond better to CNC'ing.

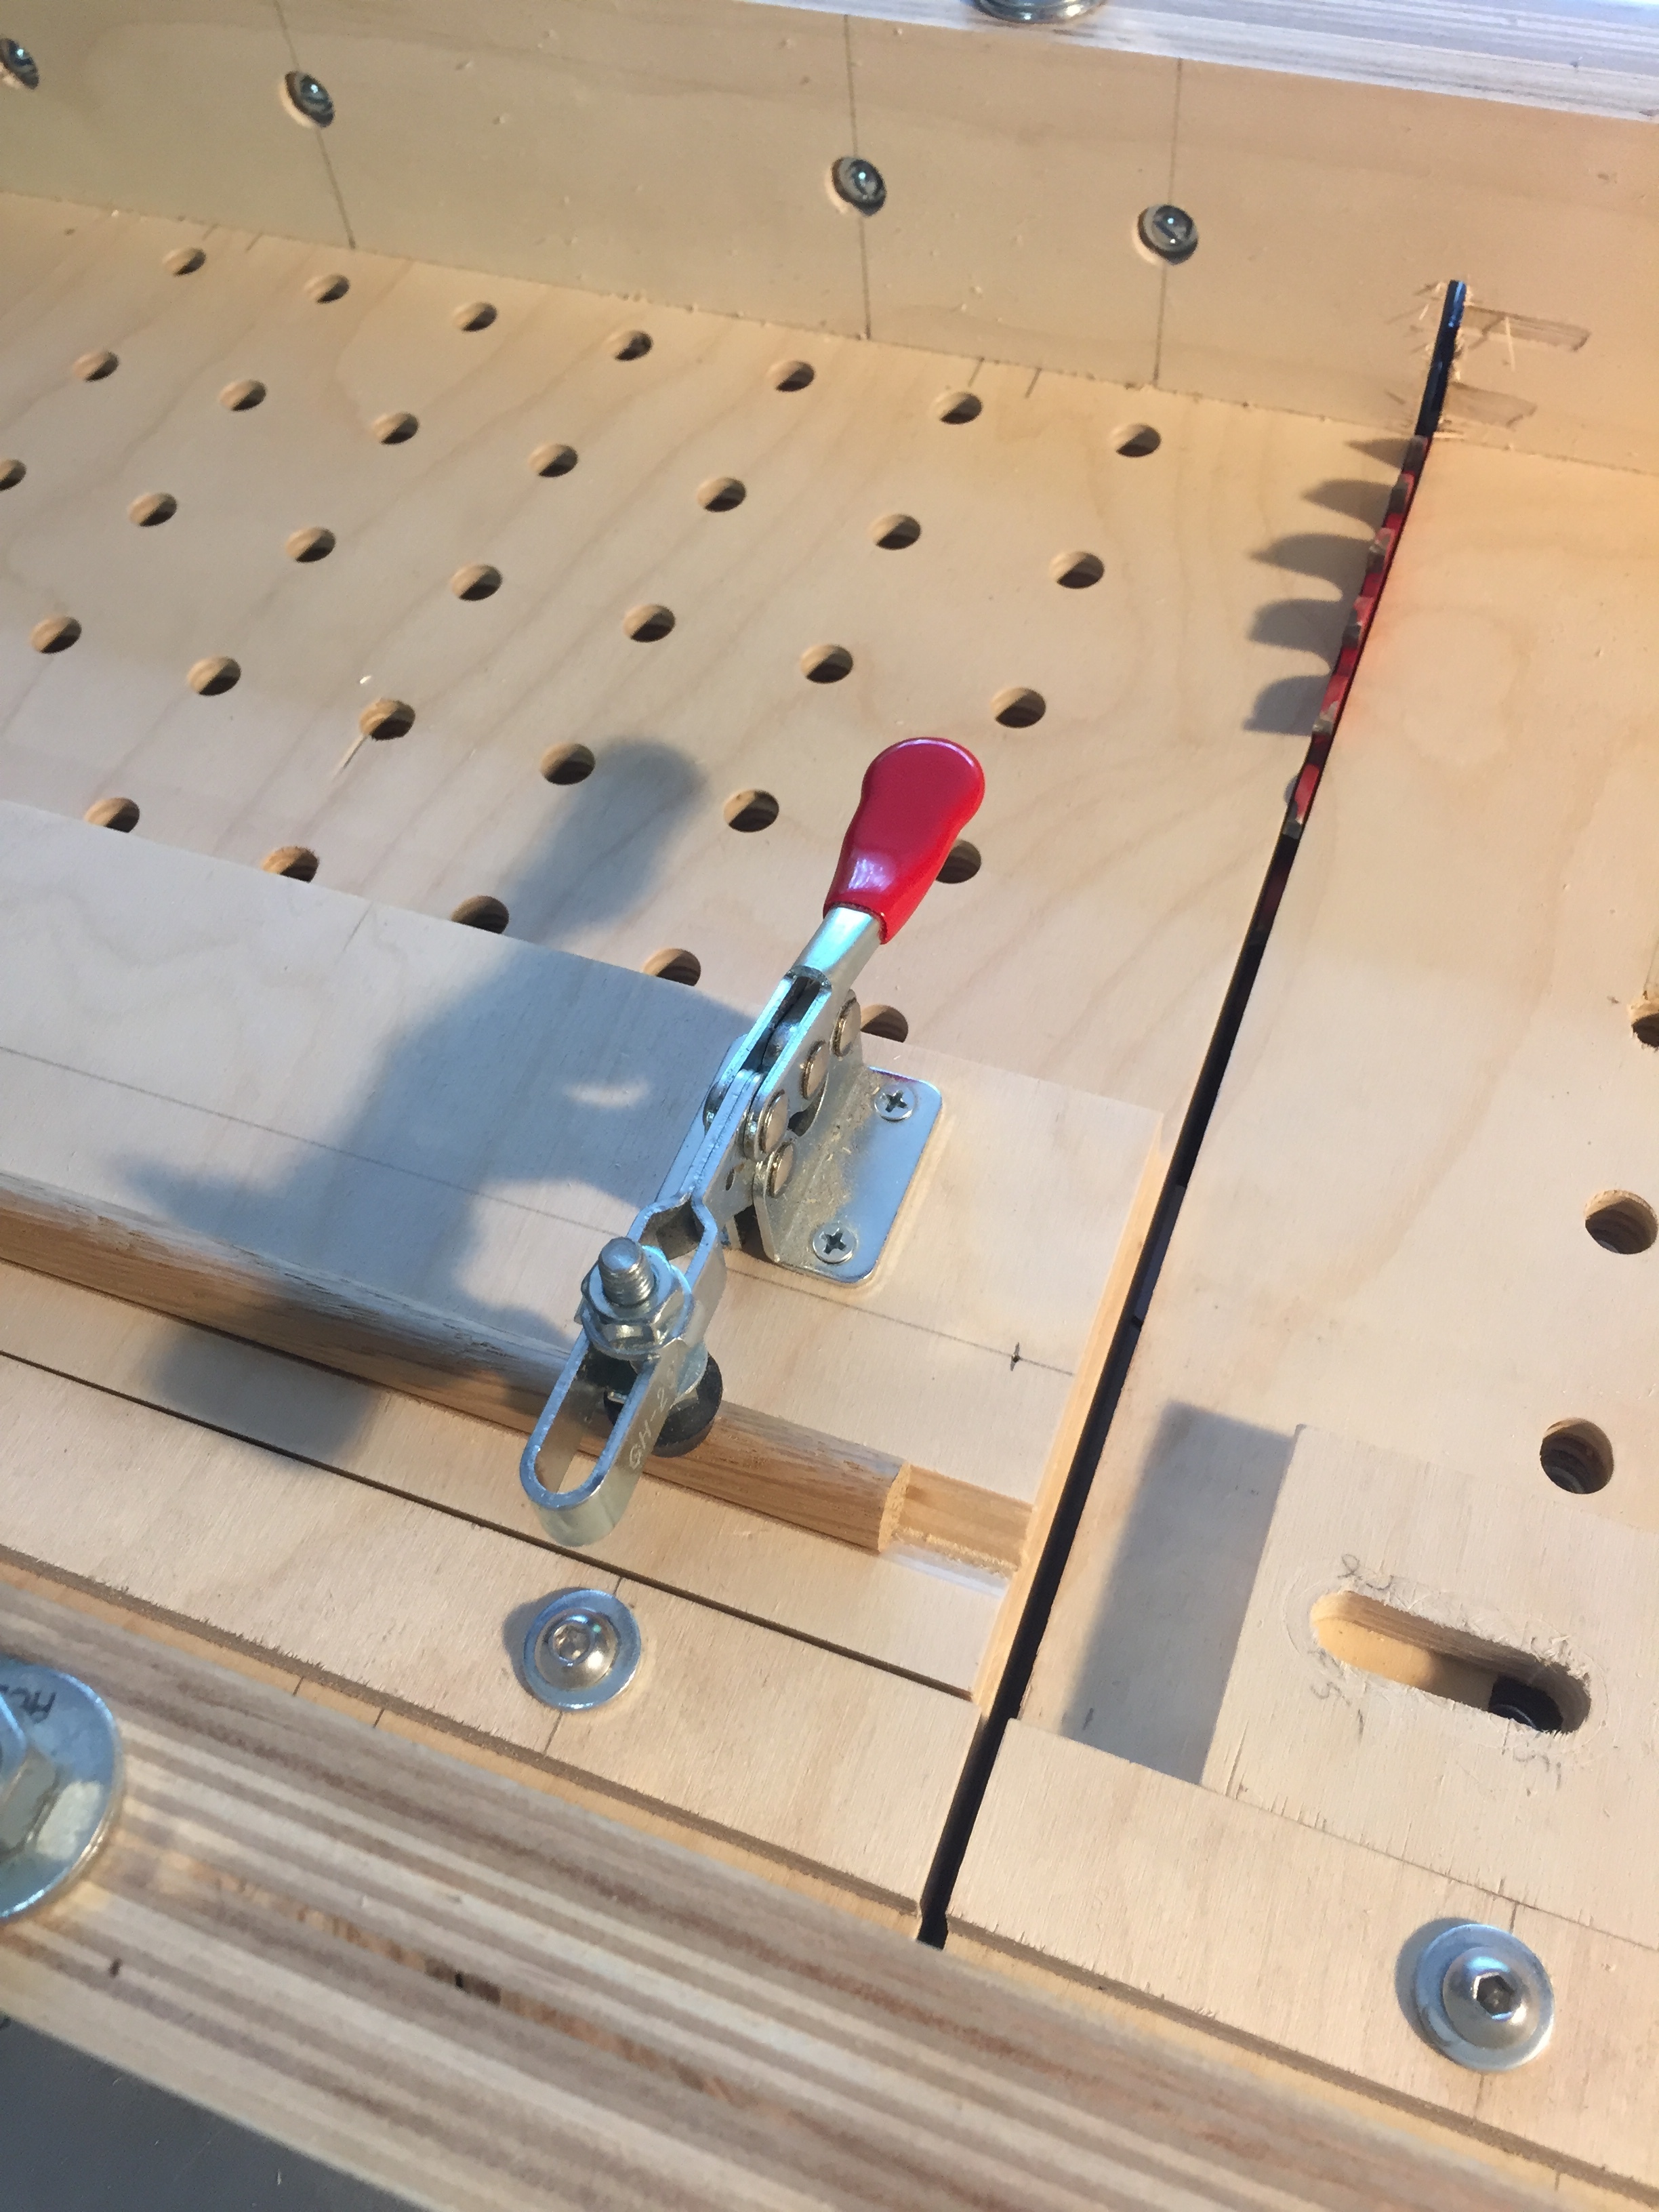
Heart Key.JPG

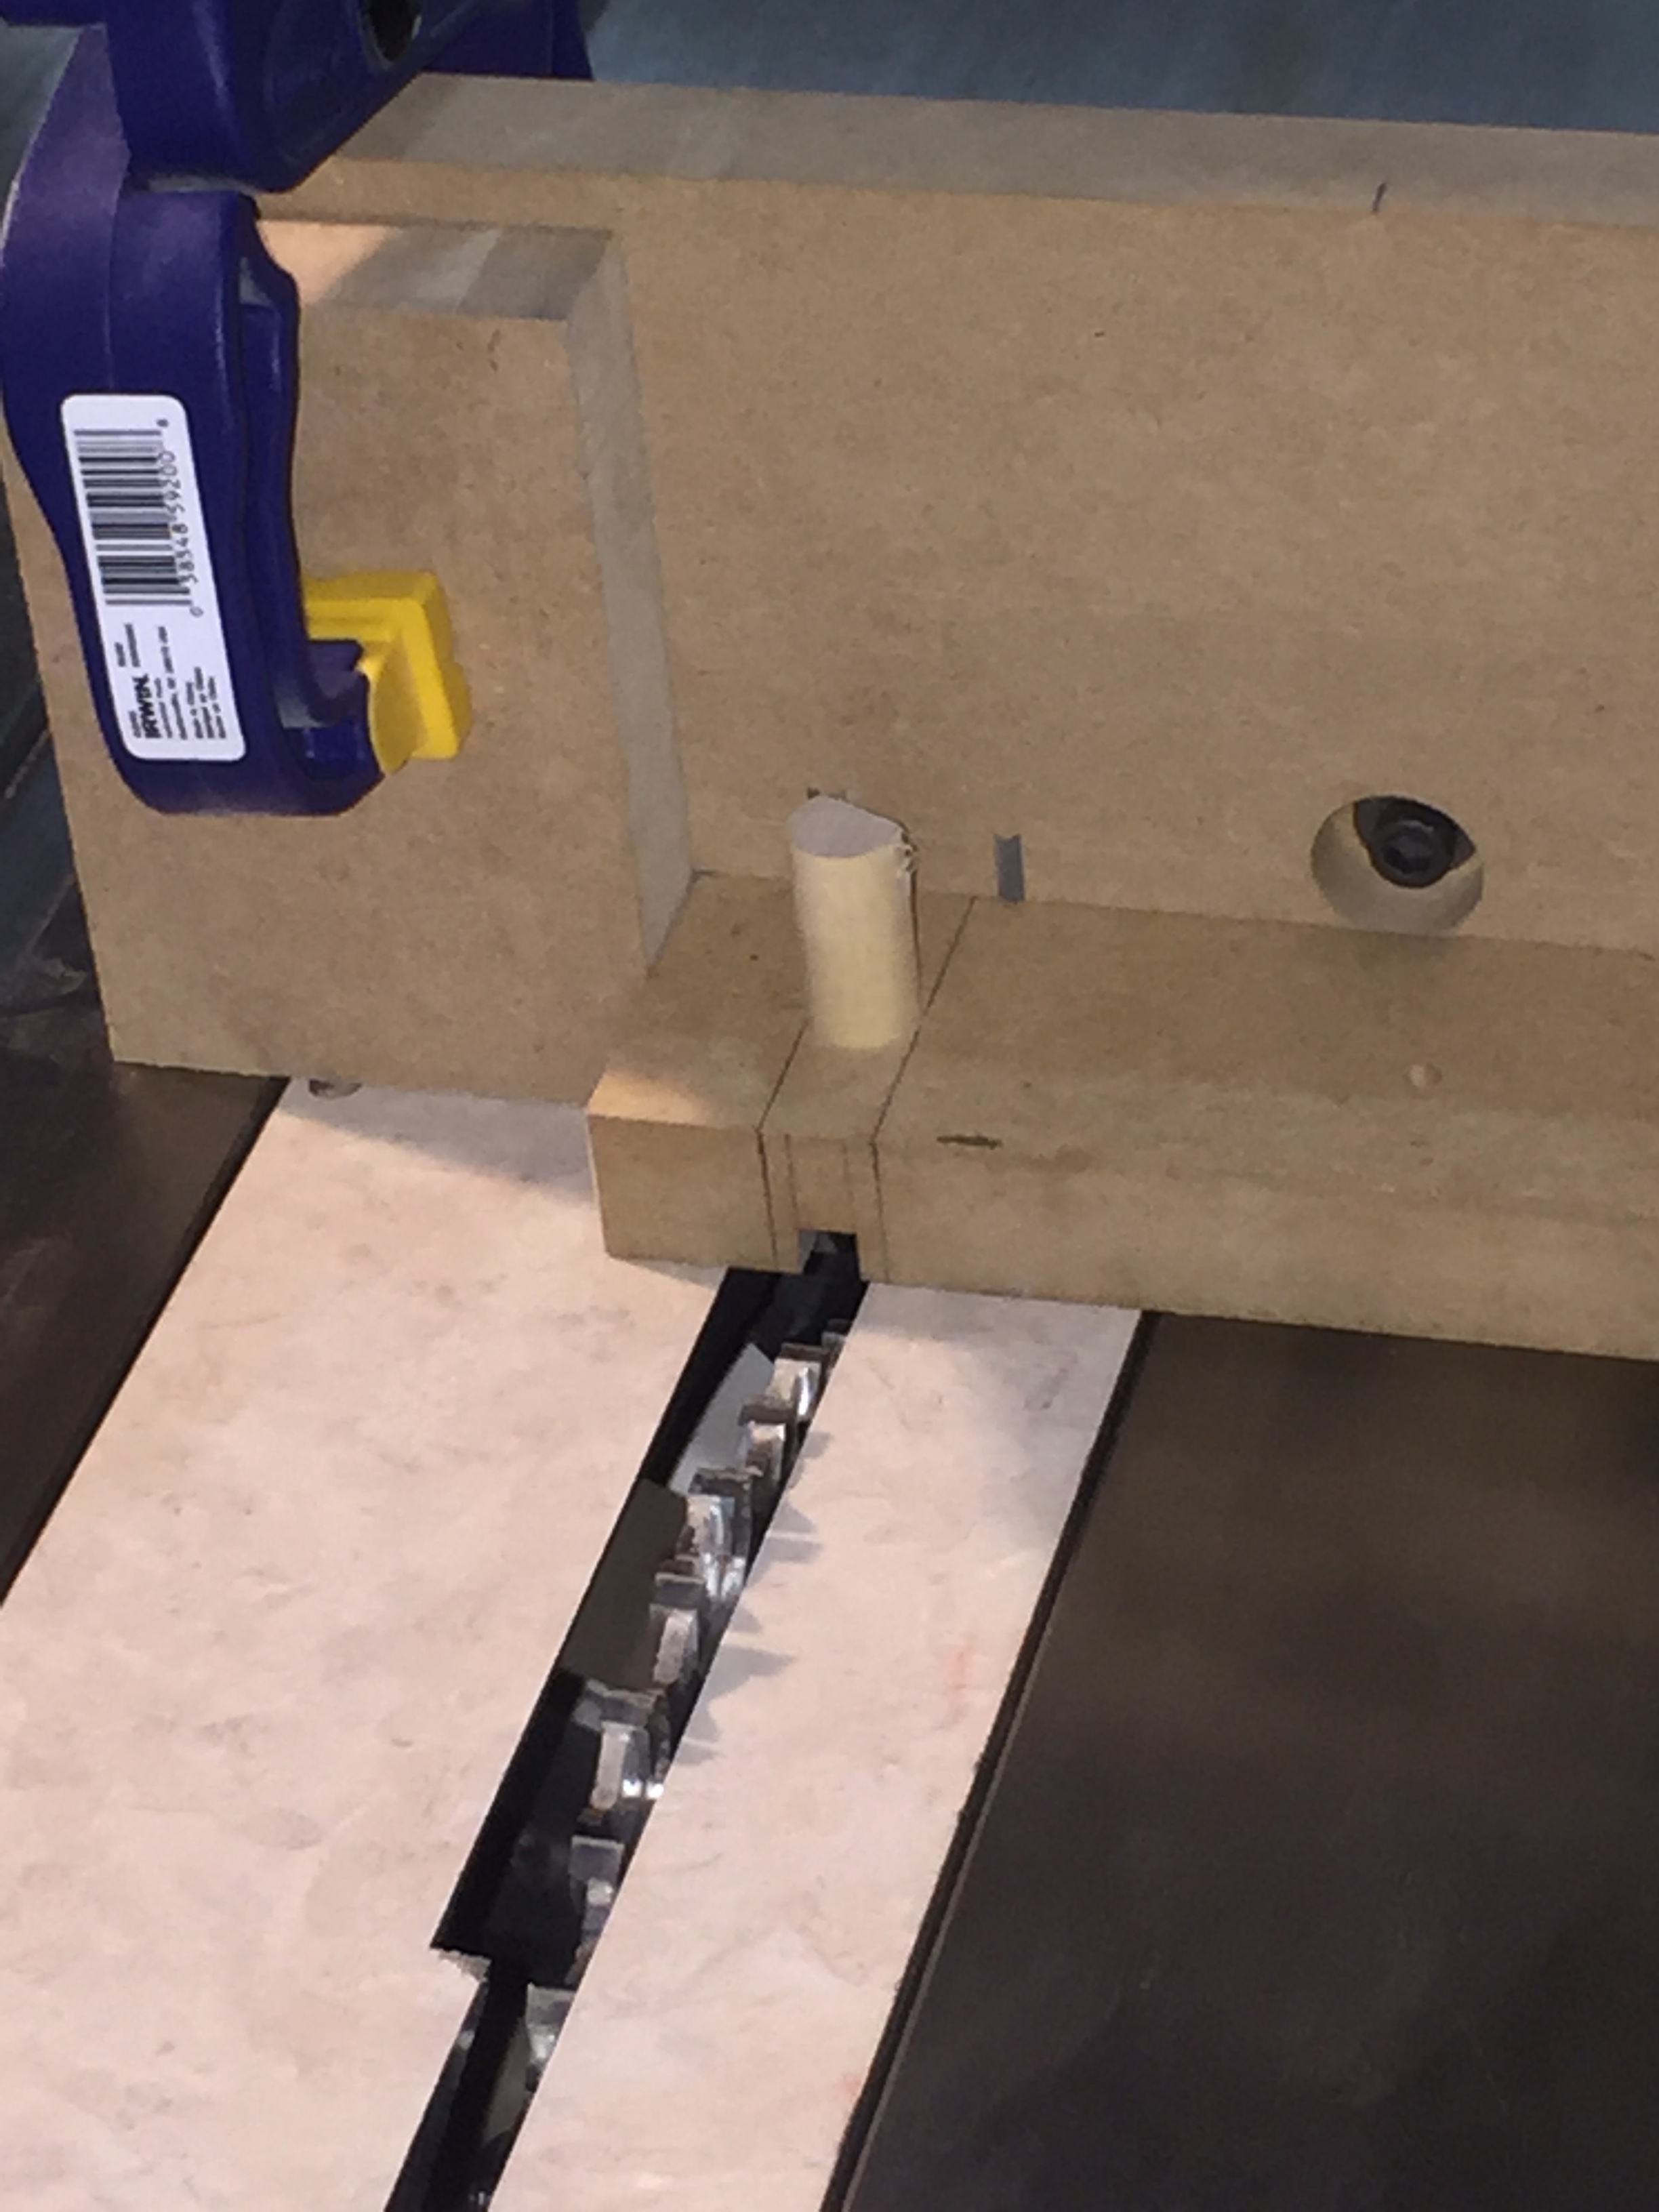
The engagement box lid got some nice work down over the weekend.  I made the two heart keys.  Doing these meant figuring out how to make some tricky cuts.  First was cutting the flat on the edge of a dowel.  I made a fairly simple jig that holds the dowel in a v-groove with a toggle clamp and then I can slide the whole jig along the fence to cut away a flat section (using a flat top bit).  Then, I needed to cut a notch in one end to hold a little heart section (just jigsawed out).  I tried several clamping scenarios that were all dicey garbage and then finally, I just drilled a 1/2" hole in a bit of MDF to hold the dowel vertical then aligned it on the saw to cut a 1/4" groove through the middle (using my box joint blades).

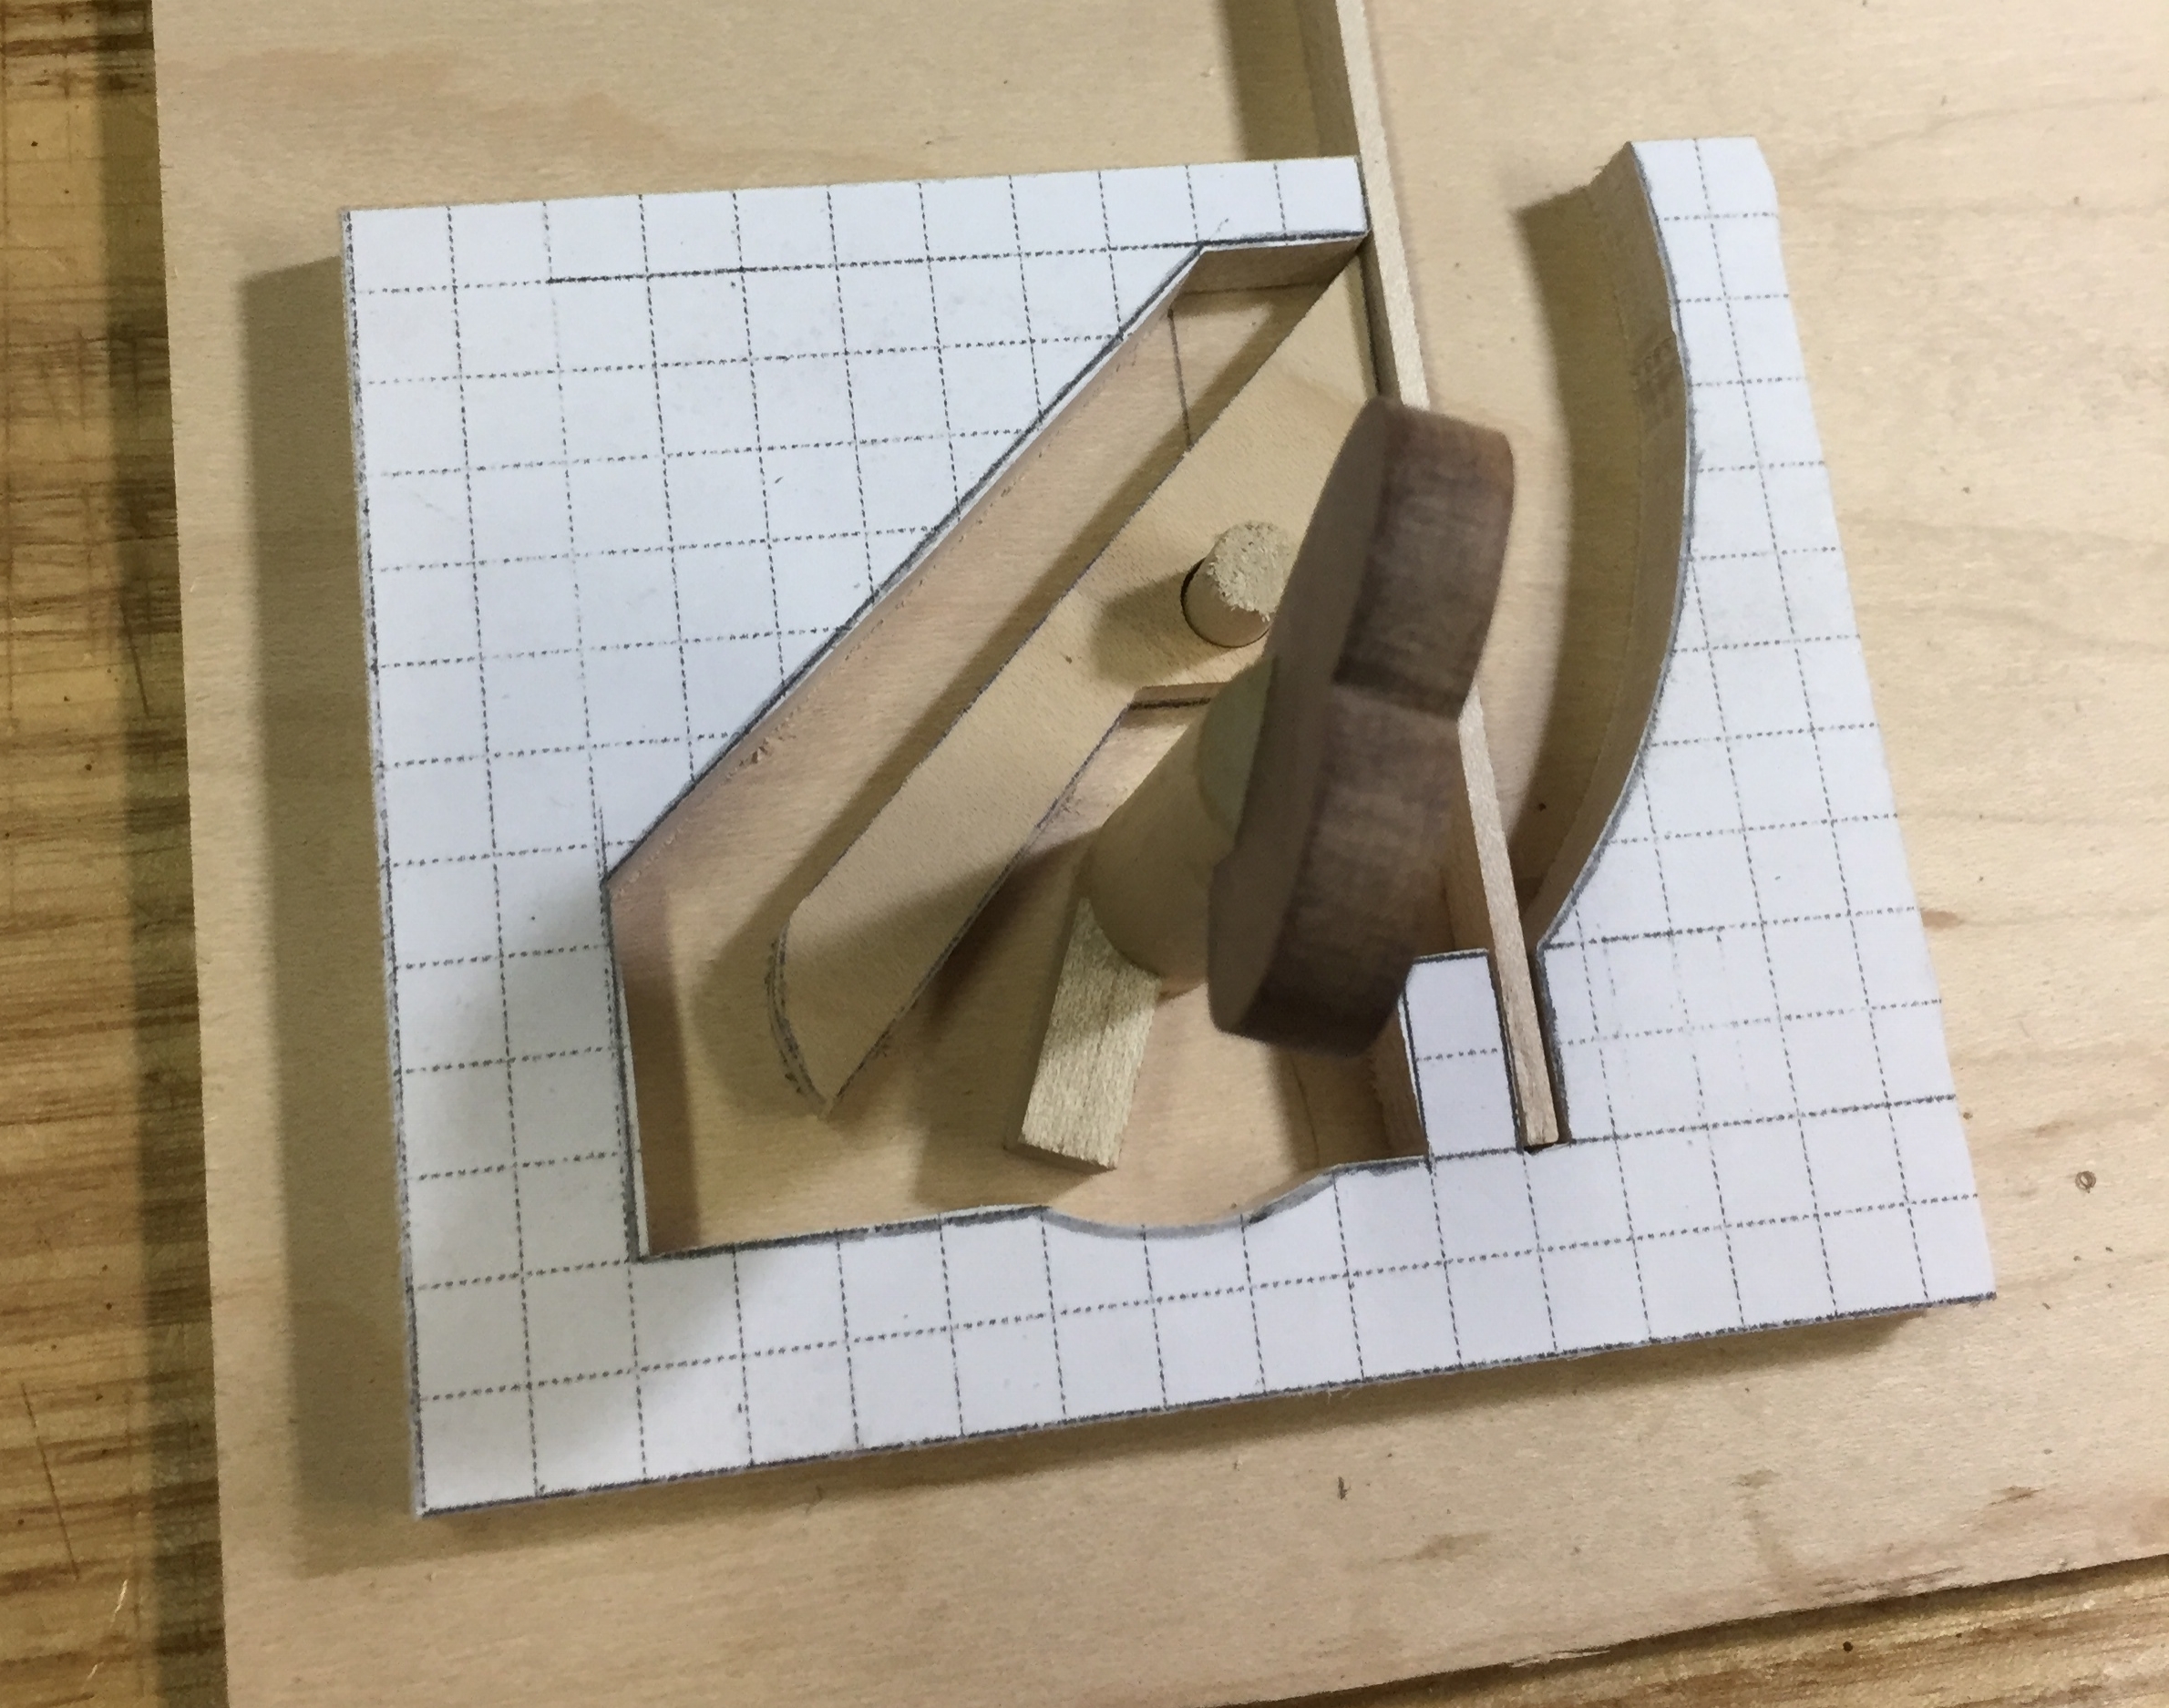
Lock and Key.JPG

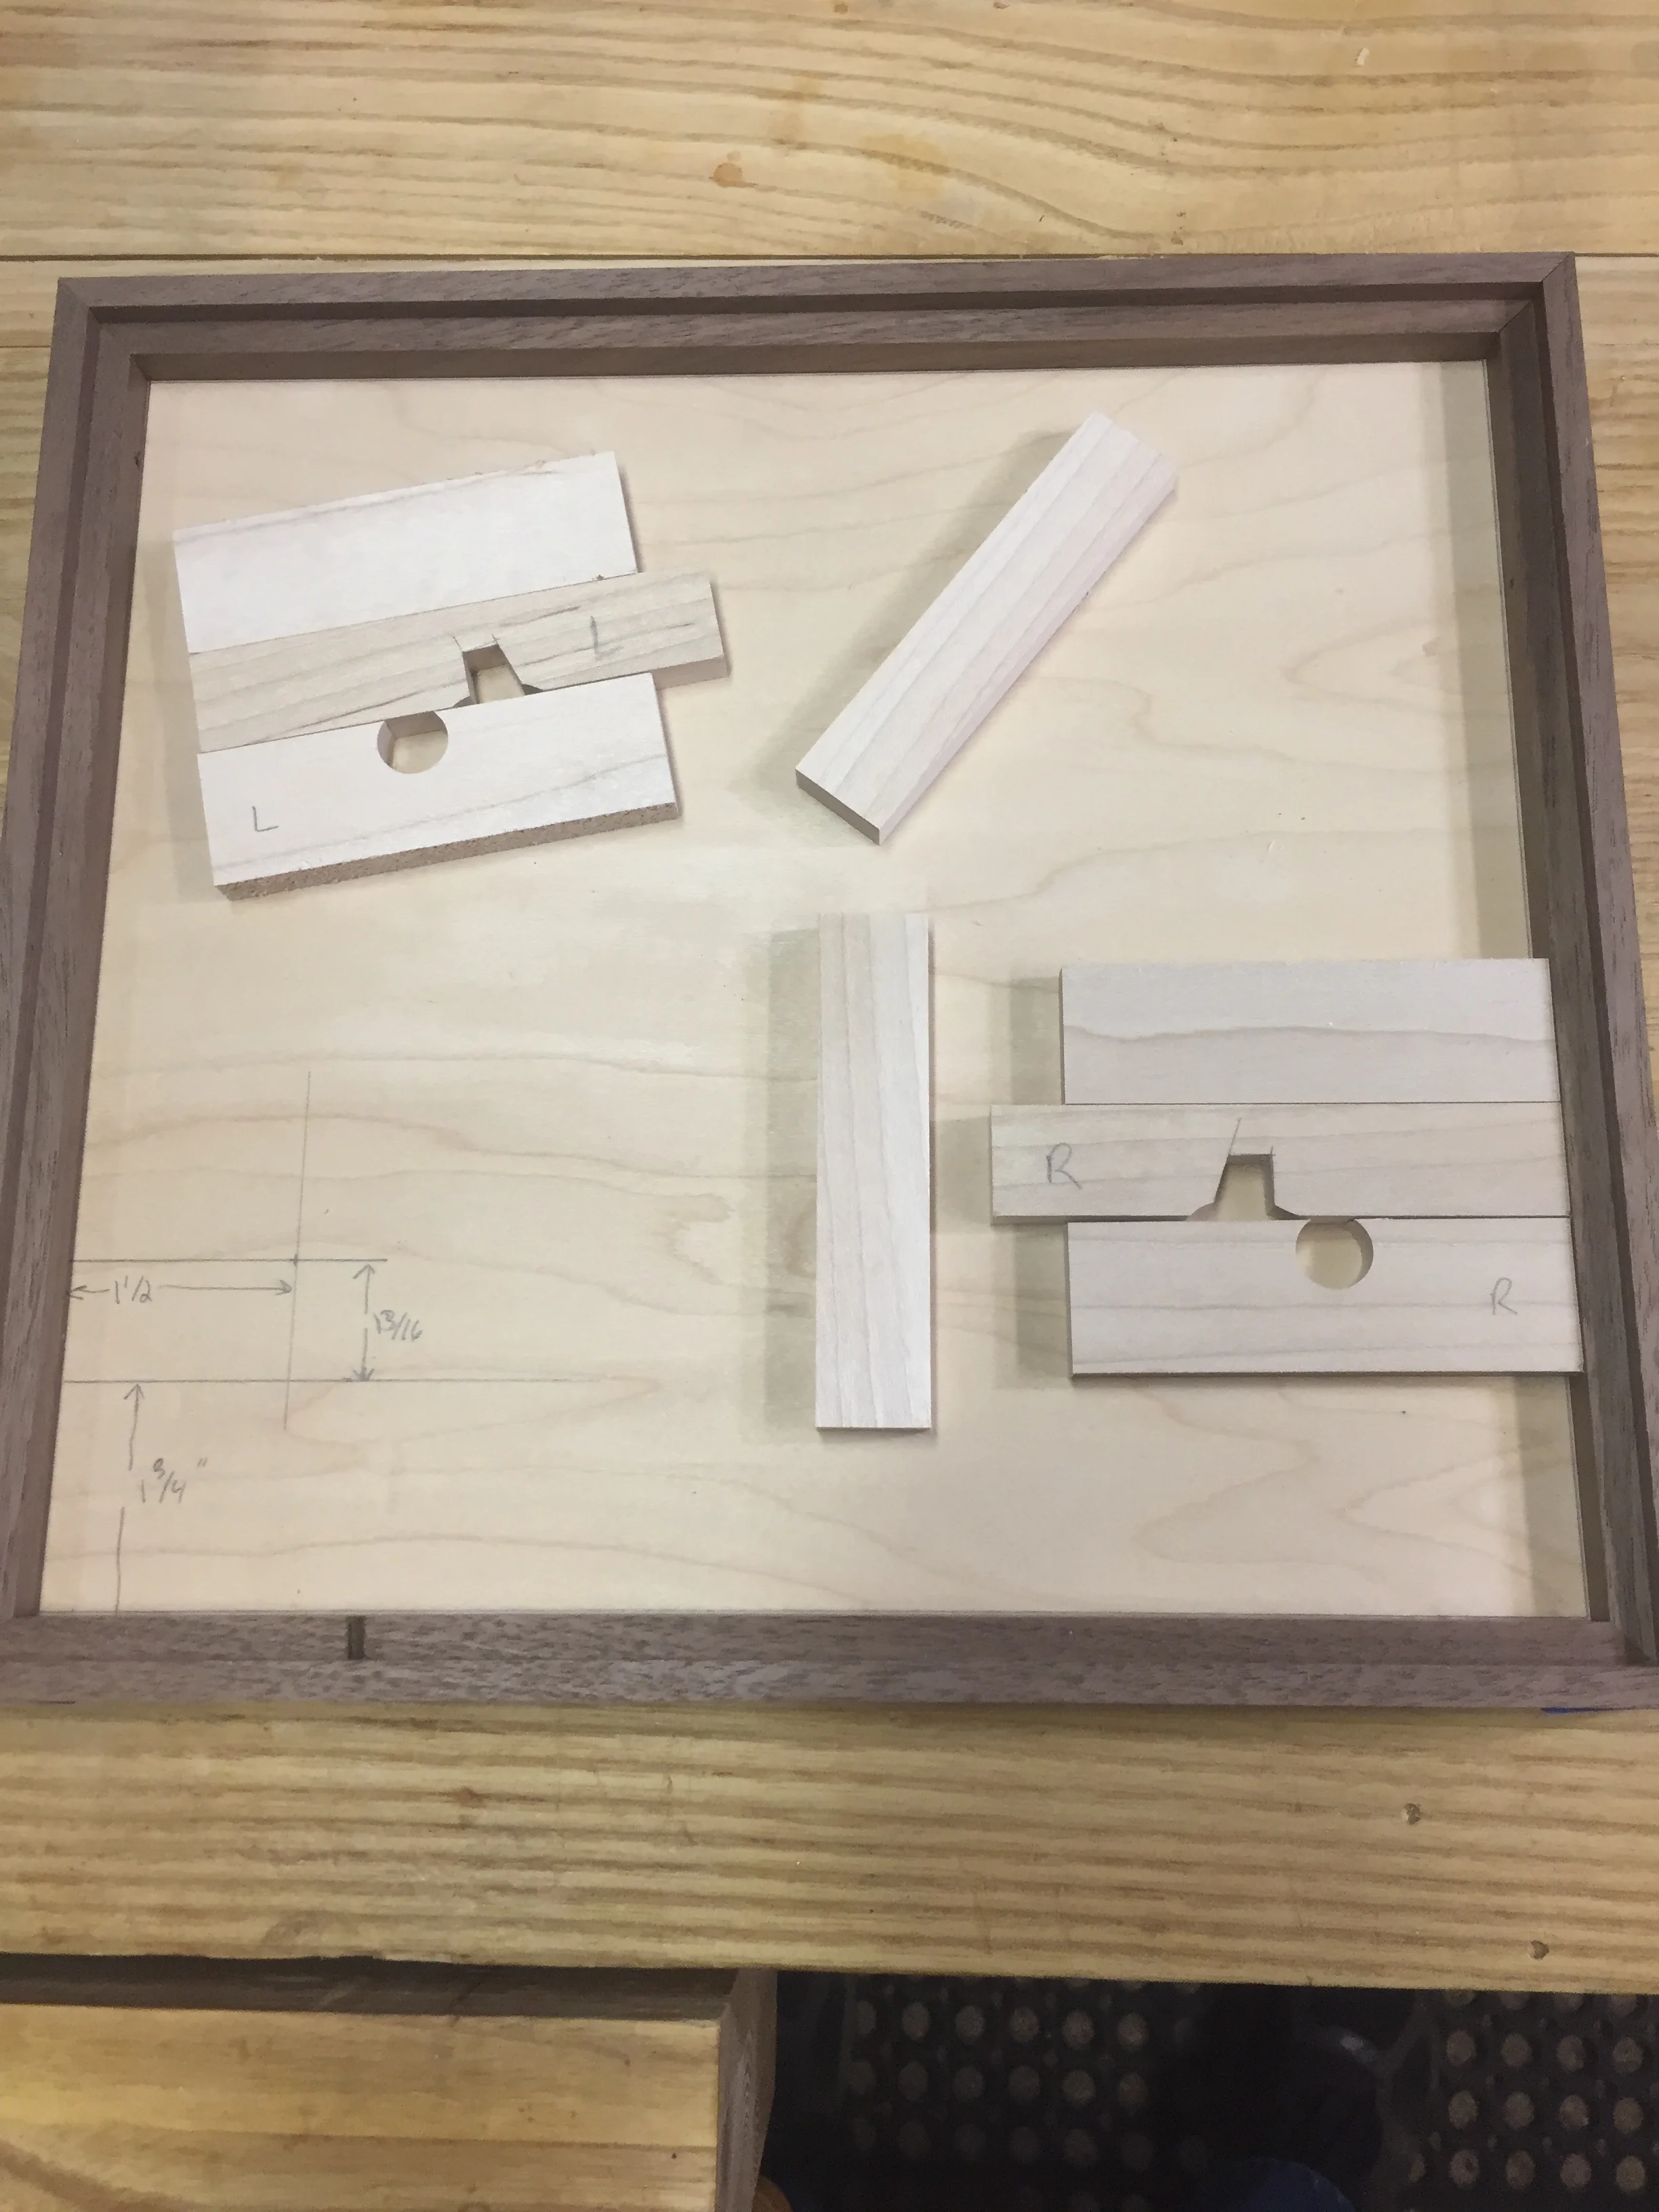
With the keys wrapped up I started in on the locks.  I'm using a design from Tim Detweiler's book Making Working Wooden Locks .  I had to some drawing so I got to have fun with graph paper and ruler and a compass.  I'm planning on using a fairly standard wood spring.  I finished the drawing, cut out the two lock bodies and then realized I made a teeny mistake.  I made the slot to hold the spring 1/8" when I wanted it 1/16".  I figure I can either fill that extra at glue up time, or just re-cut them as they are pretty simple to make.  I need to make the wood springs and I know I have some nice flexible ash around.   These will sit inside the lid and I'd like to make sure the mechanisms are accessible.  

Setup Blocks (2).JPG

Lastly, I have to say again, I love setup blocks.  I am reaching for these more and more often for all my setups.  I think the main reason is that as I get older, well, I don't see so well and it's easy to miss a line on a ruler.  But stacking a few setup blocks together is almost foolproof - I just need to get the right blocks.  And it's so simple to those between the blade and the stop.  I really need to get a larger set and maybe a few more 1-2-3 blocks.  Combine these with digital calipers and everything is readable and easy to use.

It was nice to get some real time back in the shop.  You know, like a few hours in a row.  I look forward to finishing up these lid locks.

Till next week, stay dusty.

Week Ending 03 June 2018 Update

This started out looking like it another week that was going to make getting into the shop tough.  And that proved correct.  Monday was a holiday here in the US, Memorial Day, and then it was back to work.  The day job was just nuts and I had to work every night, so there went any possible shop time.  Hopefully this will let up so I can get back to the fun.

Engagement Box Side Catches.JPG

The weekend opened up and gave me some work time, even though the weather on Saturday was beastly hot and humid and it was June 2nd.  I didn't like the new side catches for the engagement box - they worked fine but thew were a tad jiggly.  So I made a new set that were a tad (like 3/32") longer, fit them and finished them.  I like the fit much better, there is a lot less play and I left them a tad tight in case I want to sand them ever so slightly.  They should work much nicely and look and feel great.  There is still the hole under it that used to hold the screw attached version, I haven't decided if I'll just leave it, since it's mostly hidden or maybe fill it with some colored epoxy.

Engagement Box Top Lock Design.JPG

I also got started on the top locking system.  My first try didn't work the way I wanted, it would unlock but the design of the catch was such that the springs wouldn't push it closed again.  So I worked out a way to use something more like a key that when turned will slide the lock open and the spring behind it will push it closed again.  I spent more time laying out dimensions on paper than I got to do woodworking, but that's not a bad thing.  Good plans are necessary.  My goal is to have a design that I can still take apart to work on if ever needed.  Plus, I had to work out a way that I could still install and remove pieces, so the piece holding the springs will be removable too.  After some tests with plywood and poplar I was ready to get onto the real thing.  I wanted to use maple, it's strong and more wear resistant (not that these parts will get a lot of use).  I had a little piece that with a bit of resawing gave me 2 pieces - I figure why turn good wood into dust on the planer.  A combination of the table saw, drill press and jig saw get these pieces in shape.  I'm sure I'll still have adjust things as I go.  And these are for a test lid - I'm not even working on the actual one yet!

I did notice that the iris drawer I have for the engagement back is now starting the stick a bit when opening the iris.  It could just be the extreme humidity and this is a mechanism that requires an accurate fit.  I'm hoping I don't have do do fixes or a rebuild here.  Even though, I was thinking of trying to re-cut the mechanism in plexiglass to see how it works.  And I haven't tried cutting plexi on the CNC yet so it'd be a nice excuse.

I didn't get time to do any cipher wheel work or major website work this week, but I plan on more.  I'd also like to add more sections to the website about building puzzle boxes, making mechanisms, types of puzzles, etc.  I still want to make a go of this professionally, so building a solid site and would really help, plus allow me to give back.

Till next week, stay dusty.

Week Ending 27 May 2018 Update

Boy, ever have one of those weeks where you you spend way more time dreaming about being i n the woodshop than actually getting to spend in the woodshop?  Well, I didn't even get that far.  It was a rough week with the day job which kind of stretched into the evenings too.  Couple that with a long holiday weekend and an extra day of vacation (in which you'd think I'd have more shop time) and a desire to get away a bit and my shop time was very slim.  But I saw Deadpool 2, so there's that.

What did I do?  Well, a bit.  I made a second top for the engagement box out of some scraps so I can work out the locking mechanism for it.  I tried one mechanism and while the movement would unlock it, it would re-lock itself.  That was frustrating as I had hoped it would work.  But alas, no.  So, back to the drawing board.  I think I'll switch back to more key driven ideas while what I was trying was a piece slid to the side when an angled wedge was pushed in.  A more traditional key would rely on the turn to move slider methodology.  

Having gotten stuck on the lock, I did spend a few hours fitting existing pieces of the engagement box.  I wanted to make sure everything was working perfectly and a few pieces movements were still just a bit fiddly.  Bit of sanding here, curve an edge slightly there, widen a gap just a tad.  The lock that holds the side door shut wasn't working the way I wanted.  So I decided to remake those pieces and change the mechanism just a bit.  At first I thought the new ones were a no go because they were too wobbly, but then I realized my gap was just a tad too large.  The gap was about .26 inches and the piece was around .238 inches.  I know, that seems tiny but it left a noticeable wiggle I didn't like.  Once I reduced that gap, it's snug but still movable.

I did some sort of woodworking.  I mean, I was working, and wood was involved.  I've had a stump from a pine tree that blew down over a year ago in the barn lot.  My last chainsaw died and I bought a nice shiny Stihl 311.  But, this stump eats chains.  I'm just trying to make the stump small enough to move, but these things grow around all kinds of rocks and dirt which means by the time you see the chain smoking in the cut, you know the blade is gone.  So, I got mad and picked up an axe.  It's going surprisingly fast, actually.  I just swing for 5-10 minutes when I'm free and I should have the stump cut down in another few chopping sessions.  Old School!

On the digital side of the business I added a new page to the cipher wheel section.  I didn't get time to record a new video even though I have an interesting one to do on a numeric rotation symbol cipher.  That should be fun!

Until next week, stay dusty!

Week Ending 20 May 2018 Update

This week was one rather devoid of shop time.  The day job was rather a bit busier than normal and wanted more hours from me.  Sometimes, that's just what happens.  Fortunately, I was able to do a bit of woodworking in the few open periods of time.

I made "the lollipop" which is a nice little key for the engagement box that will live inside the cryptex until it's found and it's purpose is to release the iris drawer.  It was a simple affair, just a small round disc about 3/4" in diameter with a hole in one end for a dowel.  I found it best to mark out the circle and then drill the whole before cutting the circle as it was much easier to hold steady with square edges.  Nothing fancy to cut this, just freehand close to the line on the scroll saw then finish on the sander.  Add a bit of dowel, sand it thoroughly and give the regular Danish oil treatment.  I'll let that cure for several days and top coat with a bit of Minwax wiping poly.

I managed to make another cipher wheel video, this one on creating a numeric index keyword cipher.  I used the symbol script to create a very unique looking cipher.   I do wish I had a better setup for capturing video but a new camera rig just isn't in the cards right now.  So, I'll make do with what I have.  I'm still editing with iMovie on the Mac, but I'd like to try using another tool called Shotcut on my Windows laptop.  Video is an area I feel I have a lot of room for improvement.

Finally I got a few hours to start working on the top of the engagement box.  The top is inset into the box and is made from walnut edging with cherry ply top and bottom.  The center will hold the mechanism to unlock it.  I still need to work out how the lock will function, but I have a few ideas to try.  I want to have it need 2 key objects that will be found in the locked side compartments of the box.  The top will also get some carving and laser engraving of a picture, so it has some neat things coming.  After that, it's just final fitting and and then sending the box on it's way to Australia.

Lastly I toyed with building a platform to hold short lengths of PVC on the CNC so I can cut the slots and drill the holes for more cryptexes.  I'll keep poking at this project in the coming weeks.  Having a way to mount and index the PVC on the CNC will make creating more of these much easier and considerable more accurate.  I find coming up with mounting, holding and indexing strategies for a CNC a lot of fun.  It's a lot like solving a puzzle.

I hope next week will have more shop time.  I'd like to work out that locking method and get that piece moving forward.   I've still got a set of partially built puzzles boxes to eventually get back to as well.  

Week Ending 13 May 2018 Update

This week was marked by finishing, fitting and finishing some more.  The 6 new cipher wheels are nearly wrapped up, the last coat of finish is drying.  Fitting them took a bit of work.  Getting one circular disc to run perfectly from a center pivot in a circular opening takes a bit of work.  Even tiny error mean it won't run totally true and need some sanding and adjusting.  I err towards the side of easier turning so that nothing can bind up over time.  

Finish strategy for the cipher wheels is to spray the carved wheels with shellac, let it dry then coat with a dark stain and wipe off.  I used General Finishes Nutmeg on these.  The shellac fills the carved areas and the shellac keeps it from penetrating the surfaces much.  Let them dry a good 4 hours.  The edging was pre-finished with Danish oil then cut to size, mitered and attached.  After everything was good and dry I top coated with 3 coats of Minwax wipe on poly.  Finally, I could wax the movements and assemble, using a bit of blue Loctite to keep the wheels in place but still turning.

While the finishing supplies were out I also top coated the puzzle box I am making as part of a commission.  It went on well and looks great.   Just two coats were needed for this.  This leaves me with just the top to make and that needs some laser burning on it.  I'm still working on how I want it's lock to work.  I'd like to do something with magnets, but I'm also thinking something spring loaded.

I also had a meeting of a new CNC club that should be fun going forward.  Knowledgeable group of people and fun too.  We spent some time discussing the types of problems we've run into and how to solve them.  Operating a CNC is the kind of thing that has a seemingly endless series of things that can go wrong.  My last problem was while making some cipher wheels - I had the router off with the pencil tip carving bit when I when I told it to start. The gantry moved that bit even though it wasn't spinning and there went $30.  Such is life.

Lastly was recording a new video for using the latest cipher wheels.  This one is about numeric shift ciphers.  Only took 3 tries to record a good one.  I still need to edit and upload it.  I certainly want to do more, using the symbols, numeric keyword shifts, symbol rotation, etc.  Lots of fun stuff to come.  I also want to add pages to the website to categorize and explain different encoding techniques.

Until next week!  

Thinking like a machinist

I know it's been a while, a long while, but I'd like to get back to writing and blogging.

To start in, I thought I'd talk about something a bit new for me.  That was getting to spend a few nights learning how to use a Southbend Mill and doing some machining.  Mills are very different beasts compared to most regular woodworking tools.  Metalworking is quite different too (there's no grain direction?)

What I learned is this isn't a totally different world in which there is no overlap with woodworking.  In fact, we in woodworking shops could learn a lot from machine shops.  The biggest initial take away is that machinists are really good at measuring.  Like crazy good.  In many cases, it's because the tools are designed to do that.  Dial and digital calipers are very reliable and remove the parallax and positioning problems of rules.  Setup blocks are great for very accurate but simple positioning.  Dial indicators are amazing at seeing small differences (really small!) and making movements of stops and sleds repeatable.

There has been a feeling in woodworking that the extreme accuracy of machining just isn't necessary.  I've found that even if it's isn't truly necessary, why not do it anyway.  If it's actually faster and easier, the added accuracy is simply a bonus.  Dial calipers and indicators are getting more common at woodworking stores too.  Something nice you can do with even the cheapest pair of calipers - check the sizes of drill bits without trying to read that tiny engraving (I'm not getting younger and that text is getting smaller).

Another concept I learned is more a change in thinking.  In woodworking, we're not always jig or setup minded.  Sure, there are a bunch of standard jigs out there, but machinists are in the habit of figuring out how to make a jig or setup for just about any operation.  How we make and use jigs on something like a table saw is different from on a mill, but the concept is the same.  Need to know how to hold a piece and rotate it by an accurate 15 degrees, I'll bet with some thinking there's a way.  There's a lot of machinist videos with tips and techniques.  We don't have to be content with machines as the come.  

Finally, why can't our drill presses be more like mills?  One item I especially liked on the mill was the table which had a height adjustment in the front (how many of us loathe reaching around the back to adjust height).  Plus, it keeps it's position with the bit and it has lots of places to clamp stuff too.  Keeping that X-Y position to the bit is super helpful if you need to lower the table to change a bit and then want to raise it back up, but keep your center.  I'm actually thinking of trying to after market something onto my drill press to do this.  I will say, don't use your drill press for milling, they aren't made for it, it's rough on the machine and can lead to accidents.

What do you think?  Can we merge machining into some of our woodworking practices?  The machinists I talked with enjoyed having a woodworker around for a different perspective too (wait, you take the part to tool?)  I see a lot of fun and interesting possibilities.  

What To Do When You're Hurt?

So, a couple of weeks ago I was out mountain biking and apparently I forgot that I'm getting a bit older and I don't bounce as well as I used to.  I tried to take on a tougher obstacle, went over the bars and badly sprained my right thumb in the process.  Iced it for a week (often using cold beers as the ice), then saw my doctor, got an x-ray and was told no break but I should wear a splint for a few weeks.

Here I am then, a right handed person without being able to use most of my right hand for several weeks.  What do I do?  How am I supposed to work in the shop.  Should I even be trying.

Luckily, there are other things that I can do so stay productive even if I'm not making dust.

  1. I can work on designs.  I can't write too well, but I can work with a ruler and pencil well enough.  I have ideas for several more puzzles and this is a perfect time to start working up some drawings and figuring out what will and will not work.
  2. Create technical  drawings in Sketchup.  This is a free 3D drawing tool that is fairly easy to use but there is a learning curve.  Lots of how-to's online and many paid courses are available.  It's a good way to model a project for real and you can print out drawings.
  3. New tool research!  Yes, we all want new tools but some require more background research than others.  I'm looking into CNC so this is a great time to hunt down reviews, watch videos, head to stores that carry them, etc.
  4. Talk to or visit other woodworkers.  I am certainly guilty of not getting out and socializing enough.  Maybe I can't go cross country to visit someone, but perhaps this is a perfect time to send a note to an old friend and finally e-mail that one person who's work you've admired about how much you like what they do.
  5. Reading.  I have several books to get into.  Like Puzzle Craft and Wooden Boxes which are two books currently sitting next to me.  Puzzle Craft helps me come up with new puzzle ideas while Wooden Boxes covers the creation of some amazing boxes.
  6. Nap.  I mean, really, who doesn't like a nap.

I'm sure there are many more ideas, but these are just a few to keep you busy in the event you ever find yourself nursing an injury that prevents you from woodworking.  Do you have any other ideas?

Buzzing around the shop

Well, it has been far too long since I've written on this blog.  I have been busy keeping up Facebook and Instagram and building things, plus handling a day job.  There's been a lot happening, even if my woodworking has been a bit slower than I'd like.

For starters, I needed to take care of a quick job for the house - building some carpenter bee traps.  If you don't have these in your area, they are a fairly large bee, that while not aggressive, will chew through all kinds of wooden structures, like our pergola and barn.  You can kill them, but more will come back.  So, I grabbed a bit of red oak, made 4 sides per box (and mitered them, because, why not!) then drilled holes in each side that will let the bees in.  Then you put a bottom on, drill a hole in and put a soda bottle in that hole.  Pop on a top, hang it near bee activity, wait and hope.  It was fun to do something simple for a change.

Also happening in the shop is a run of 13 tea/keepsake boxes with a hidden spring loaded drawer.  I've wanted to try out doing a larger run of boxes.  I started these back around February/March thinking I'd be done in about 2 months.  Well, my estimate was a tad off.  I'm closing in on completing all  the construction, maybe a few more weeks, then I can start finishing.

This has been a big learning experience for me.  I've done up to 5 of an item, but never 13.  While it's taken a lot longer than I liked, it hasn't been without any triumphs.  You get better at doing multiples and jigs become your friend.  My puzzle makers sled has gotten quite a workout and has performed very well.  Areas where my skills or shop setup are deficient are very noticeable now.  Even through I tried to make everything the same, small errors show up and then that means hand fitting parts.  Hand fitting slows things down a lot.

I'm also seeing just how tough it is to try and do this scale of woodworking with only a few hours of week to put in.  Many errors happen just because I get part way done, then have to let things sit for days, then when I come back I hope I'm doing the right things.  It's amazing how piece meal projects like this can have errors show up.  Perhaps my sweet spot might be 6 of an item, I'll have to keep considering what volume is right for me.

So, I'm going to try to do more blogging and videos in addition to my regular Facebook and Instragram updates.  I have more puzzle ideas and I'd love to write about those and how I'm making them.  I'm also on a new laptop that doesn't have my full photo library, so i need to fix that and get pictures posted again.

Keep building!

Setup Blocks, Where have you been all my life?

As a puzzle box maker, I'm finding myself more and more working to engineering tolerances.  I spend more time with calipers in my hand than a rule.  Recently, I added a set of setup blocks.  What are setup blocks, you ask?  They are very accurately sized steel blocks of common sizes, such as 1/6", 1/8", 1/4", 1/2", 3/4".  As you can see here ...

Each of the black blocks is accurately sized - I checked them against my calipers and they are good to within .0001.  The block that they are sitting on is called a 1-2-3 block.  In each dimension, it is either 1", 2", or 3" and it is also just as accurately size.  With all these blocks, you can make a wide variety of different measurements.

How would you use them.  Actually, very easily and probably much easier than most other methods.  Lets say you want to set a stop block on your table saw exactly 2 1/4" inches from the blade.  You could make a mark on a test piece, but it, measure, then adjust the fence this way or that until it's just right.  Or, you could grab your 1-2-3 block and the 1/4" spacer, put them by the blade, slide up your stop block and clamp it down.  I like option 2.  And, when I worked, I found the accuracy of the cut piece outstanding.  Just remember to remove the blocks before turning on the saw!

Here's another common task - you want to set the depth of a plunge router cut, say for making a recess.  You could set the router so the bit is plunged flush with the surface of the workpiece, then with a square try to set the plunge distance of the bit or you could scrounge around for a scrap piece the thickness you need to set the plunge stop.  An easier way, set the router on a flat surface, plunge it till it touches the surface, then loosen the plunge stop, grab a spacer of the thickness you need, put it in your plunge adjuster and lock it down.  Once again, another very accurate job.

 What else?  Lot of things (for which I didn't grab pictures).  Set the height of a router bit at the table - just stock the blocks and adjust to bit to the same height (it's easy to feel when they are the same).  Set your router fence, select the right blocks and position them between the bit and the fence.  Lock in a dial caliper width - measure the right setup block and lock down the calipers.  

Where to find these blocks?  I got these from Lee Valley.  You can probably find others via web searches or Amazon as well.  The set I received was well machined and I know Lee Valley stands behind their work.  Most places that sell metal working equipment will likely have these as well.  Sizes of sets can vary.

Want to adjust to even smaller distances?  Get a set of feeler gauges (automotive stores have these) and you make changes down to .0001 inches.  Yes, you can accurate and easily set of a cut at the table saw to 2.0001 inches.

What am I doing when not setting things to tight tolerances?  I am wrapping up the latest set of puzzle boxes - which I have now decided to call "The Button".  The amount of work needed is greater than I imagined, but they are moving along nicely and I hope to have at least 2 out of 5 done in the next 1-2 weeks. I have plans for a set of simpler puzzle boxes in my head and I'd like to get moving on those as well.  Plus there's a crazy new customizable cipher machine in the back of my mind that needs some time at the drawing board.  We're in the peak holiday season, so it seems I'm losing  part of every weekend to a party as well.