wood lock

Cryptic Woodworks Weekly Update 16 Dec 2018

I’ve had a fun couple of days in the shop. The weather is getting colder but the kerosene heater deals with that. The day job wasn’t quite as busy which gave me some extra time to work. Christmas is closing in so I’d better get to work on presents, but hey, I’ve got a week!

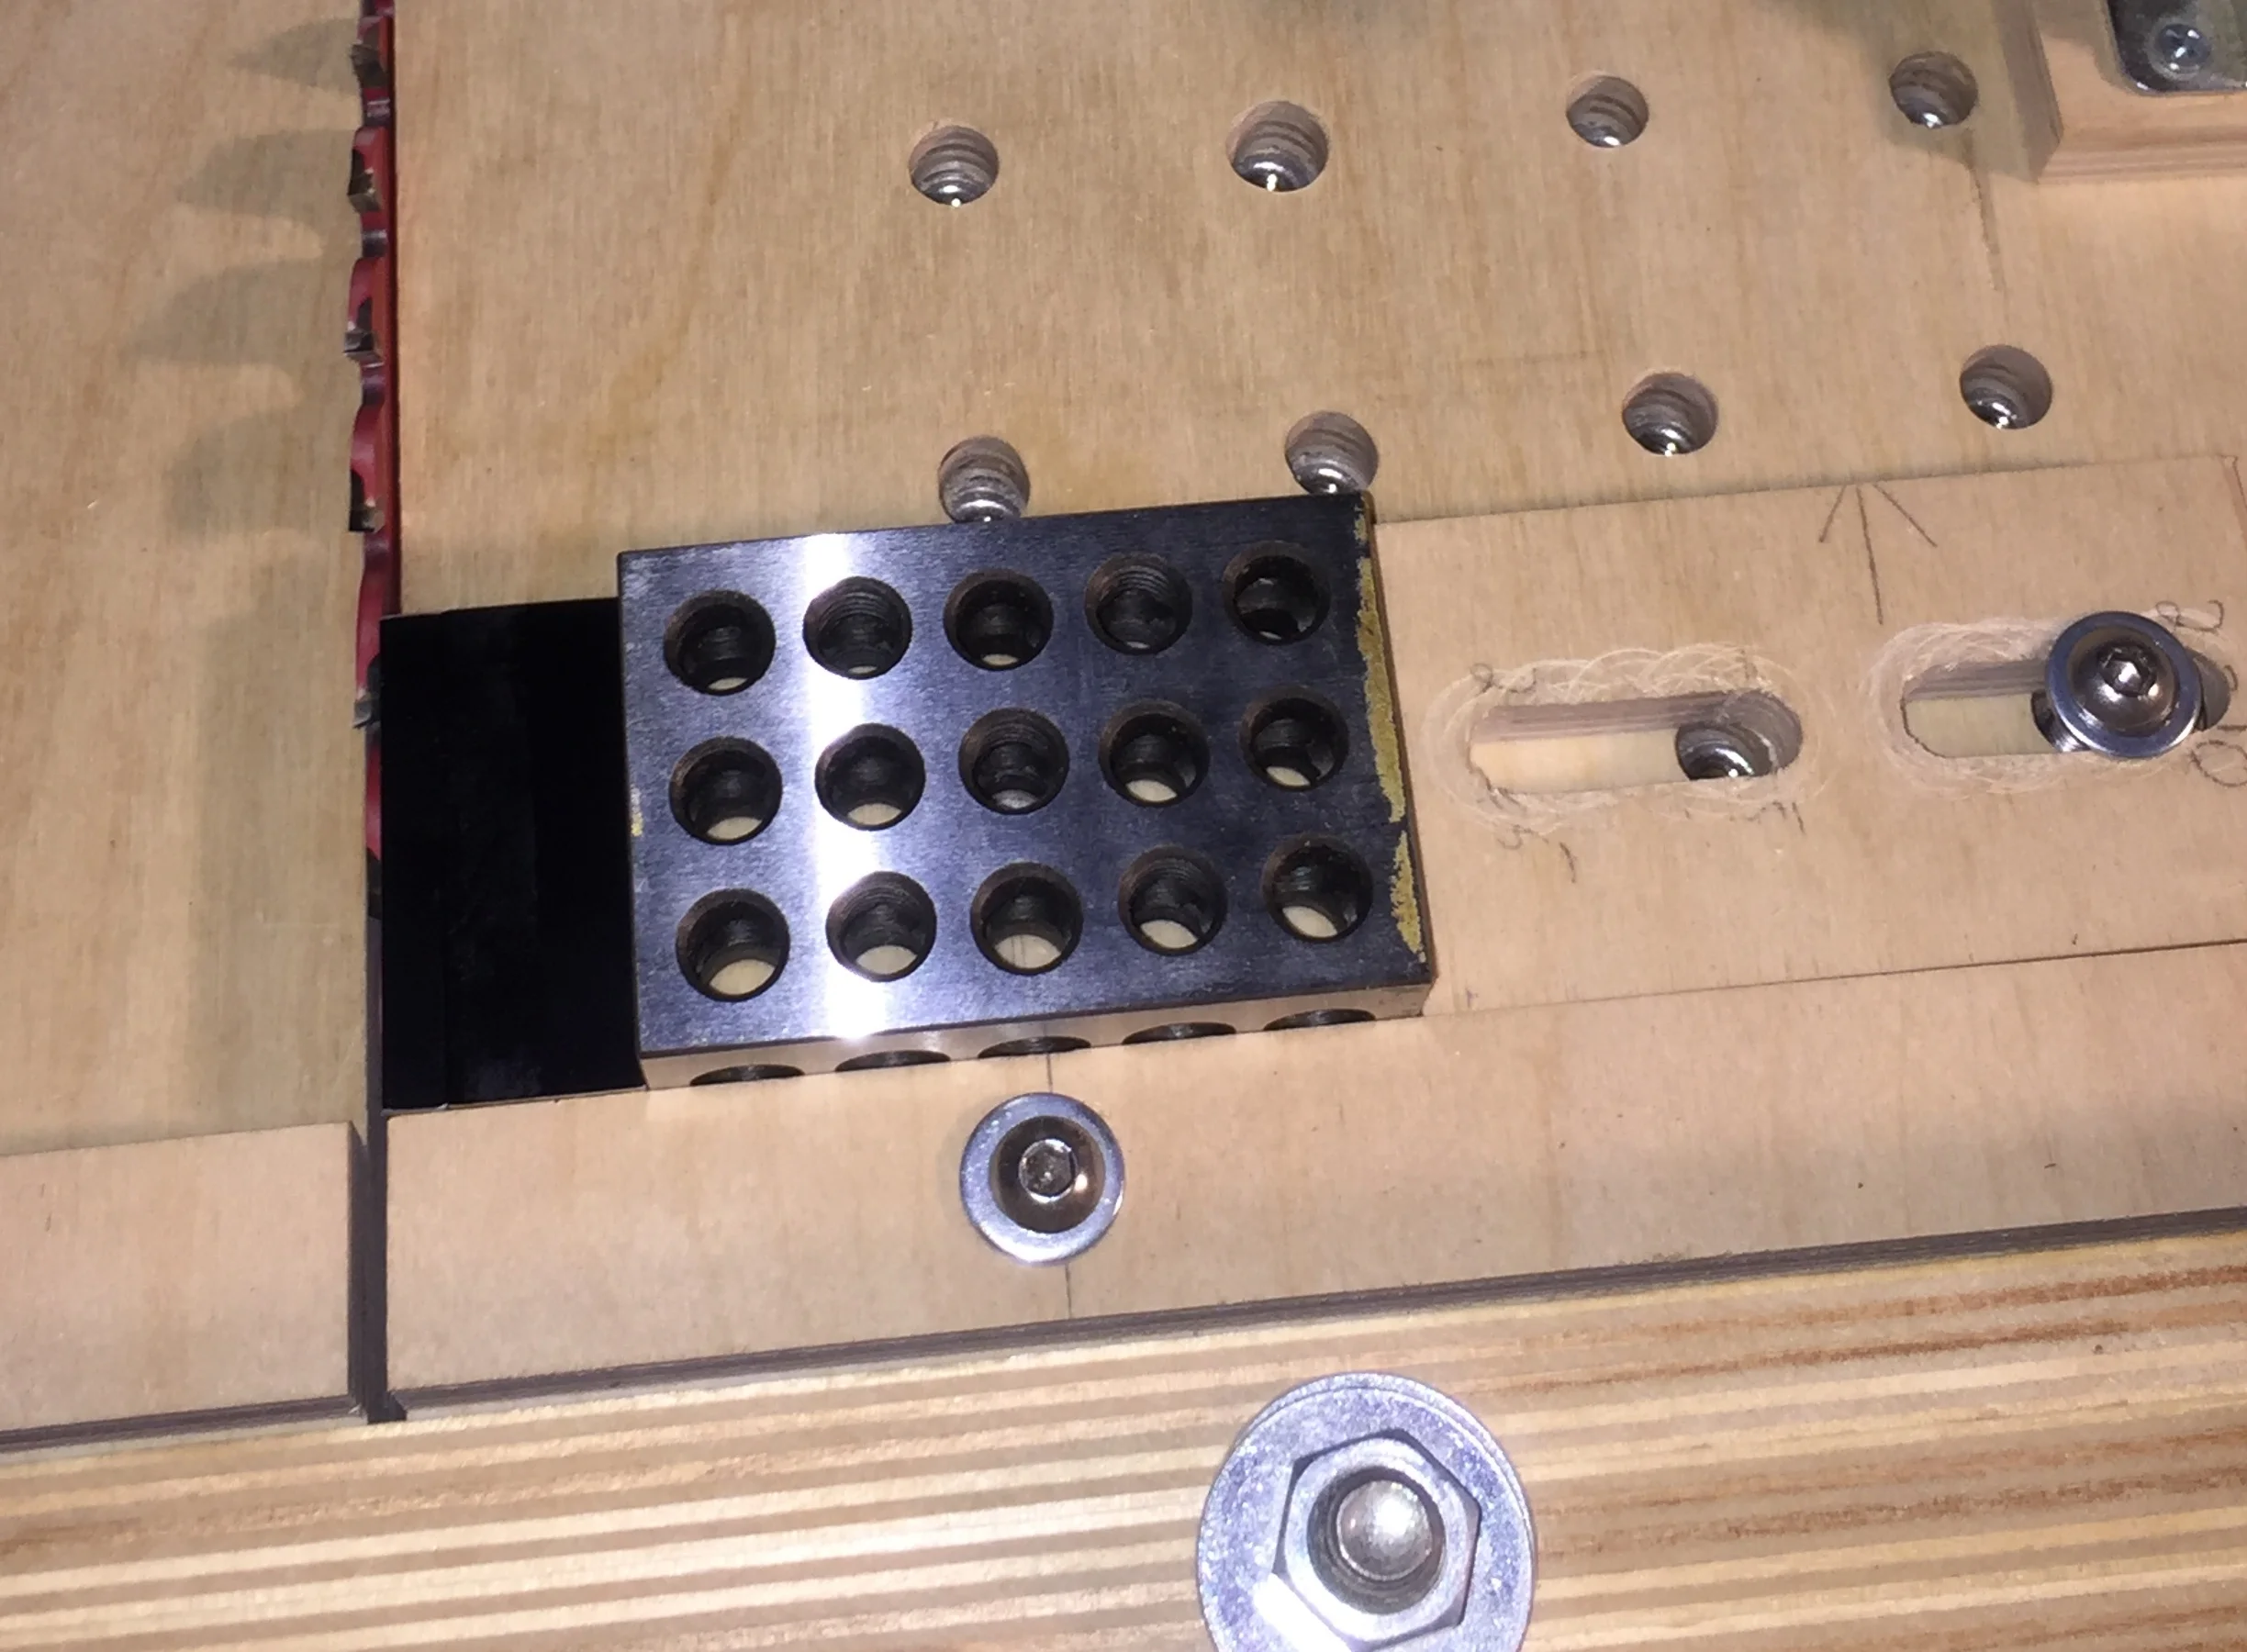
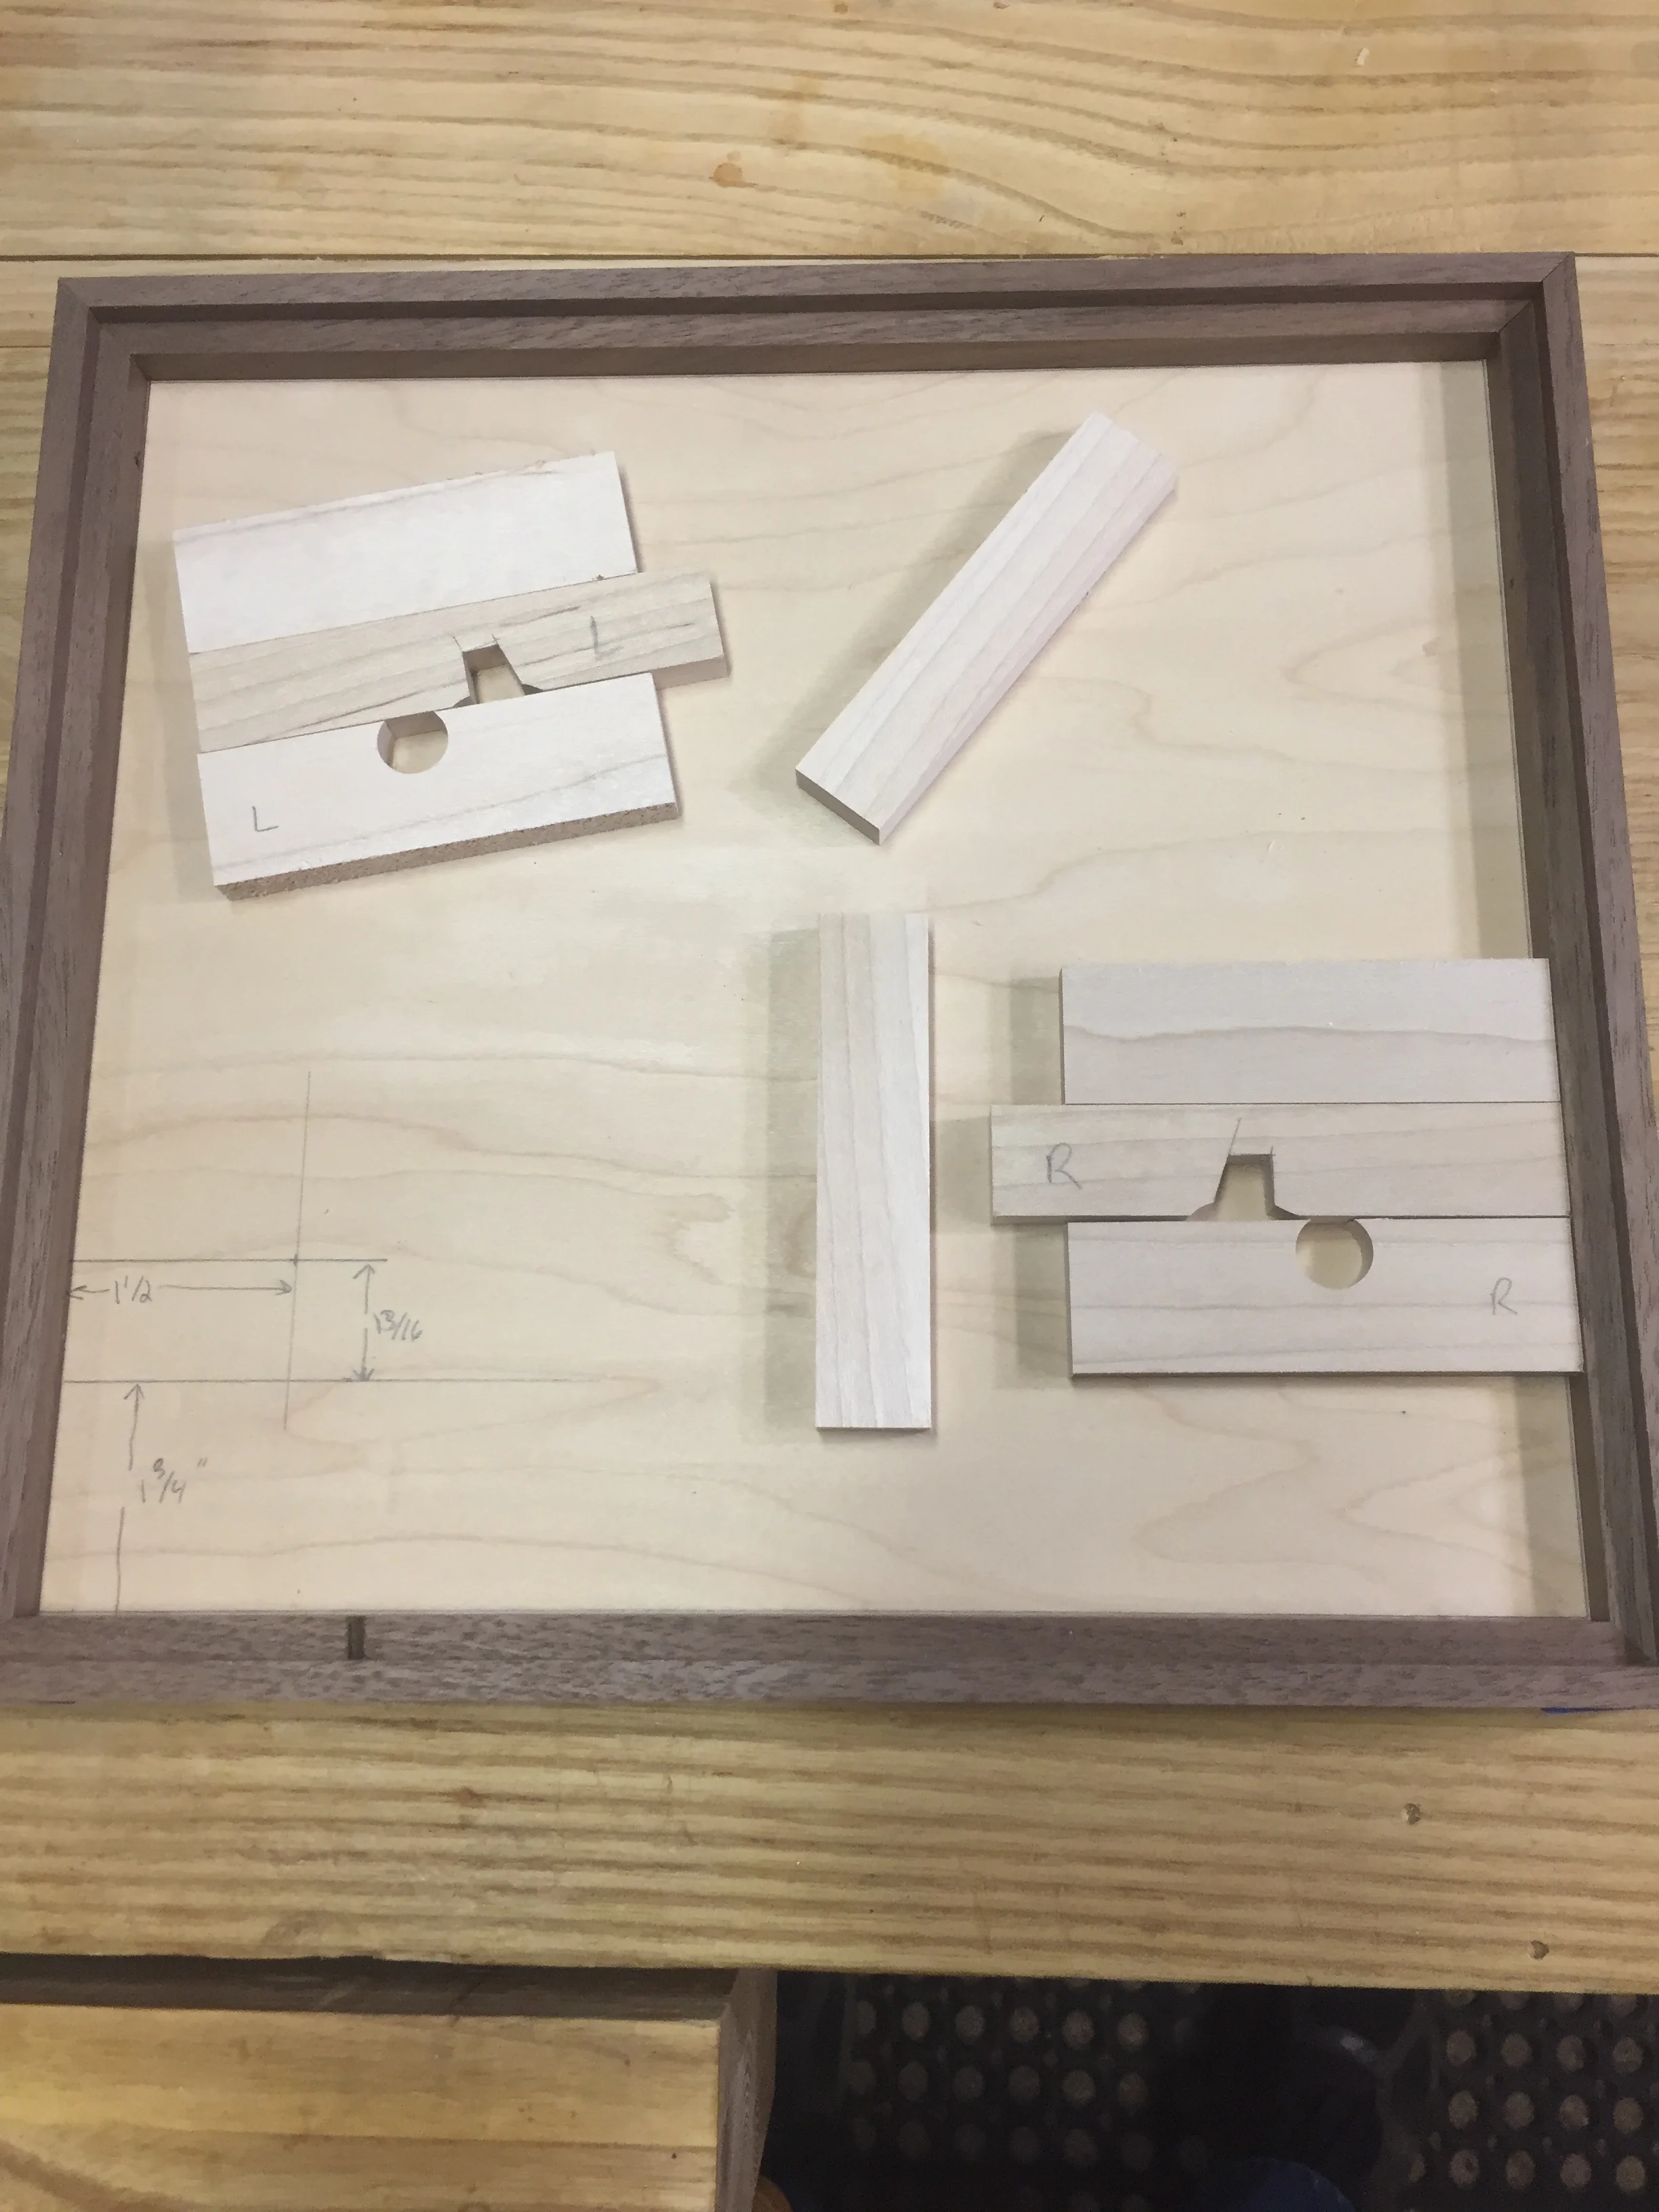
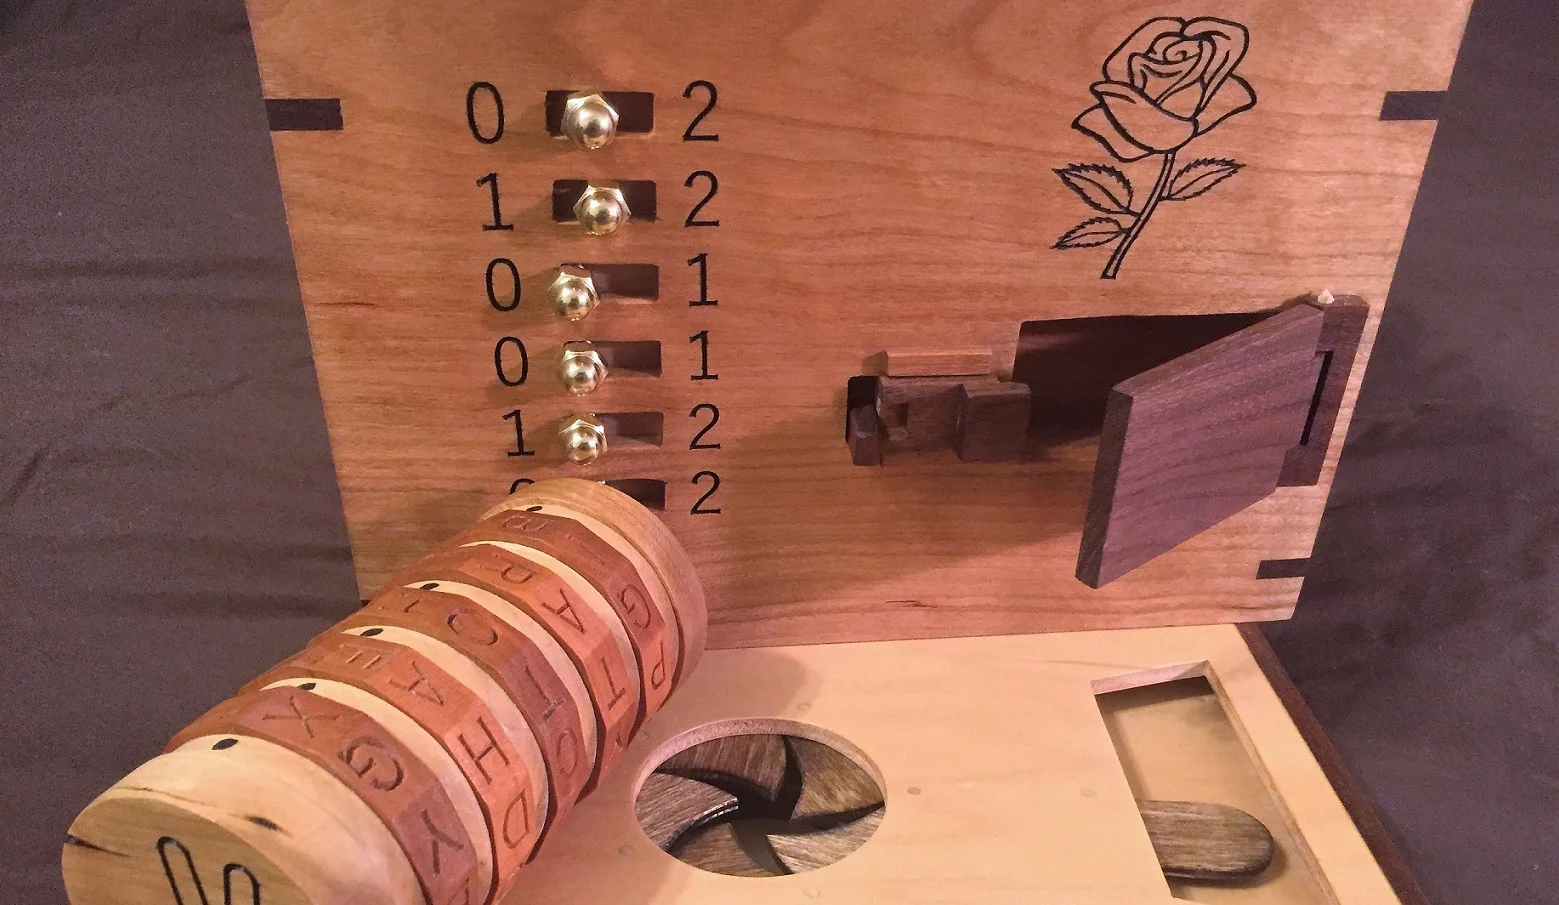
Most of my work was on the engagement box. After getting the picture transferred last week I could do some remaining work on the individual parts before assembling. I added some extra bordering and text to the bottom of the lid with the image. This was via my normal method of stencil mask, CNC carve, paint, remove mask. I cut the lock bar notches into the frame, then glued up the frame, glued in the bottom (which stays permanent) and glued down the lock components. In the picture, you can see I use a pretty standard spring lock - being simple means it also works simply and I like that. I’m attaching the top with a few screws and threaded inserts. This way, if those locks ever do have a problem someone could open and fix them. I have to get 2 more threaded inserts, I didn’t have enough on hand! What remains then is to apply some finish to the lid, put notches in the box to capture the lock bars and then drill holes for hinge pins. I can see the finish line!

Sign Edited.jpg

I also did a quick Christmas gift job that was a CNC carved sign of a friends favorite sayings. We just layed it out in v-carve, picked nice fonts and sizes, then the usual mask, carve, paint and peel went on. Later we’ll do some light sanding, shoot on a few coats of lacquer. We wanted to do something personal and handmade. I think they make great gifts.

While I have off Monday apparently I get to go and try to find a new fireplace fan. Our went Friday and of course the shop that sells such parts isn’t open over the weekend. So, instead of shop time I get to run around, hopefully find the right fan and install it. And I was hoping to get going on making Christmas puzzles. Oh well, have to do what’s necessary, don’t we. At least without the fan on it’s still a fireplace and gets hot!

Until next week, stay dusty!

Week Ending 17 June 2018 Update

Hey!  I managed to get some shop time this week.  It felt sort of novel, actually.  Weather was fairly nice which made working in the evenings nicer too.  Looks like the nice weather is about over as summer closes in though.  I didn't do a ton of work, but I felt good about getting some small but necessary things designed and done.  I am liking this weekly update format - it keeps me thinking about what I've done and hopefully I can give some ideas or a bit of entertainment to other woodworkers or creators.

Engagement Box Lid Lock Assemblies.JPG

The time this week was spent on work for the engagement box as I close in on completing it.  I mainly spent the time working on the lid locking assembly.  On the sample lid, I made several incarnations of the lock and key assembly and found the one that worked.  This is a fairly typical lock and key that uses a wood spring and a wedge on a pivot to move the locking bar back when the key is turned.  I had a few tries to get the wood spring right.  It is made from ash and is 1/16" thick.  I epoxied the spring into the lock body.  I need to adjust (or make a new) piece on the left one here as it's a little short and doesn't extend the spring quite as far.  I think it's easiest to make the rotating piece a tad big and then sand it to final size.  After the main lock was in place, then I could mark out the hole location for the bars that will actually lock the lid.  I just drilled that out near size then completed it with jigsaw and chisel.  I want to put a piece across the top of both bars so that it can't ever move in any other direction.  The CNC came in handy for making sure the holes for the pivot pins aligned perfectly with the cutouts in the top for the keys.

Acrylic Iris.JPG

Next up was something fun.  I tried cutting acrylic plexiglass on the CNC for the first time.  I must say, I expected some type of catastrophic failure, but the result totally surprised me.  I had wanted to try cutting an iris mechanism out of acrylic and after getting some advice at my last CNC club meeting, I decided to give it a try.  While at the meeting, I picked up and 1/8" upcut spiral - you really want to get the chips away or the plastic will weld itself back.  I ran the router as slow as I could, about 8000 RPM and kept a slightly slower feed rate.  I also had the dust boot off and was following the bit with the vac.  It is very messy, throwing plastic around.  I kept a respirator on as this process can release some nasty fumes.  My only real problem is that while I had the sheet held down well, since it was thin the middle pieces tried to lift.  I should have also stuck it down with some double sided tape.  I broke one leaf that I needed to re-cut.  I cut the pieces free, assembled them and it worked.  It worked fine.  I was frankly very surprised.  I could do this again.

While at the CNC club meeting I also got a tip on a product called Oramask 813.  It is a stencil film that supposedly can take being on a CNC and stay down on even very small parts.  It's pretty cheap too, from just $5-15 per roll.  I hope with this I can lay down the film, cut the letters and symbols on cipher wheels, paint them then pull off the stencil.  I could try different colors on the wheels, all kinds of stuff.  I'll post more once I've had a chance to try it out.

Not a bad week as things go.  Hopefully I can keep this momentum into next week.  Even bad days in the shop are still pretty good.  And the only thing worse than a bad day in the shop is no day in the shop.    I got some small awards from the day job that I think are going towards something new for the shop too.  Stay tuned.

Till next week, stay dusty.

Week Ending 10 June 2018 Update

Guess how this week started out?  Yep, too much time spent with the day job.  But at least it's starting to slack off a bit and give me some openings again.  I hope work continues to lighten up, so, you know, I can get to work.

I am a bit worried about the iris drawer binding up in humid conditions, so one night I CNC'd out another set of parts.  That wasn't too long and while they are cleaned up they need a bit of sanding and fitting, maybe just another hour or so.  I figure this way I haven't a second set ready if needed.  My goal, if I need to, is to make a drawer that someone could open to repair if there are ever problems.  I wanted to do that initially, but thought I should lean towards just finishing instead of making it a little more perfect.  It's a real balance.  I might still want to make one out of acrylic but some research told me I need a new bit, probably single flute upcut.  Plus, using home store plexiglass isn't good as that is extruded, but there are other versions to buy that respond better to CNC'ing.

Heart Key.JPG

The engagement box lid got some nice work down over the weekend.  I made the two heart keys.  Doing these meant figuring out how to make some tricky cuts.  First was cutting the flat on the edge of a dowel.  I made a fairly simple jig that holds the dowel in a v-groove with a toggle clamp and then I can slide the whole jig along the fence to cut away a flat section (using a flat top bit).  Then, I needed to cut a notch in one end to hold a little heart section (just jigsawed out).  I tried several clamping scenarios that were all dicey garbage and then finally, I just drilled a 1/2" hole in a bit of MDF to hold the dowel vertical then aligned it on the saw to cut a 1/4" groove through the middle (using my box joint blades).

Lock and Key.JPG

With the keys wrapped up I started in on the locks.  I'm using a design from Tim Detweiler's book Making Working Wooden Locks .  I had to some drawing so I got to have fun with graph paper and ruler and a compass.  I'm planning on using a fairly standard wood spring.  I finished the drawing, cut out the two lock bodies and then realized I made a teeny mistake.  I made the slot to hold the spring 1/8" when I wanted it 1/16".  I figure I can either fill that extra at glue up time, or just re-cut them as they are pretty simple to make.  I need to make the wood springs and I know I have some nice flexible ash around.   These will sit inside the lid and I'd like to make sure the mechanisms are accessible.  

Setup Blocks (2).JPG

Lastly, I have to say again, I love setup blocks.  I am reaching for these more and more often for all my setups.  I think the main reason is that as I get older, well, I don't see so well and it's easy to miss a line on a ruler.  But stacking a few setup blocks together is almost foolproof - I just need to get the right blocks.  And it's so simple to those between the blade and the stop.  I really need to get a larger set and maybe a few more 1-2-3 blocks.  Combine these with digital calipers and everything is readable and easy to use.

It was nice to get some real time back in the shop.  You know, like a few hours in a row.  I look forward to finishing up these lid locks.

Till next week, stay dusty.

Week Ending 03 June 2018 Update

This started out looking like it another week that was going to make getting into the shop tough.  And that proved correct.  Monday was a holiday here in the US, Memorial Day, and then it was back to work.  The day job was just nuts and I had to work every night, so there went any possible shop time.  Hopefully this will let up so I can get back to the fun.

Engagement Box Side Catches.JPG

The weekend opened up and gave me some work time, even though the weather on Saturday was beastly hot and humid and it was June 2nd.  I didn't like the new side catches for the engagement box - they worked fine but thew were a tad jiggly.  So I made a new set that were a tad (like 3/32") longer, fit them and finished them.  I like the fit much better, there is a lot less play and I left them a tad tight in case I want to sand them ever so slightly.  They should work much nicely and look and feel great.  There is still the hole under it that used to hold the screw attached version, I haven't decided if I'll just leave it, since it's mostly hidden or maybe fill it with some colored epoxy.

Engagement Box Top Lock Design.JPG

I also got started on the top locking system.  My first try didn't work the way I wanted, it would unlock but the design of the catch was such that the springs wouldn't push it closed again.  So I worked out a way to use something more like a key that when turned will slide the lock open and the spring behind it will push it closed again.  I spent more time laying out dimensions on paper than I got to do woodworking, but that's not a bad thing.  Good plans are necessary.  My goal is to have a design that I can still take apart to work on if ever needed.  Plus, I had to work out a way that I could still install and remove pieces, so the piece holding the springs will be removable too.  After some tests with plywood and poplar I was ready to get onto the real thing.  I wanted to use maple, it's strong and more wear resistant (not that these parts will get a lot of use).  I had a little piece that with a bit of resawing gave me 2 pieces - I figure why turn good wood into dust on the planer.  A combination of the table saw, drill press and jig saw get these pieces in shape.  I'm sure I'll still have adjust things as I go.  And these are for a test lid - I'm not even working on the actual one yet!

I did notice that the iris drawer I have for the engagement back is now starting the stick a bit when opening the iris.  It could just be the extreme humidity and this is a mechanism that requires an accurate fit.  I'm hoping I don't have do do fixes or a rebuild here.  Even though, I was thinking of trying to re-cut the mechanism in plexiglass to see how it works.  And I haven't tried cutting plexi on the CNC yet so it'd be a nice excuse.

I didn't get time to do any cipher wheel work or major website work this week, but I plan on more.  I'd also like to add more sections to the website about building puzzle boxes, making mechanisms, types of puzzles, etc.  I still want to make a go of this professionally, so building a solid site and would really help, plus allow me to give back.

Till next week, stay dusty.